Fedena 3.2 is Out and Running!

Fedena-3.2

Fedena 3.2 is now out and available. The new version brings you the best of features with increased usability and power packed updates. Read the release note to learn more about Fedena’s latest version. You can also write to us at info@fedena.com for your valuable feedback and insights. We would love to hear from you.


Core Features

Dependencies are shown while deleting a student
Mark attendance for student without specifying the reason
Student’s Admission Number is displayed in Exam Marks Entry pages
Student’s Admission Number is displayed in Attendance Register
Class timing intervals are of 1 minute duration to allow different class timings
Classrooms allocation

Addon Module Features

Provision to reuse previous exam questions in Online Exam

Attachments uploaded during Applicant Registration are shown in student’s profile

Language Updates

  • Changes being done for Hindi, Deutsch, Portuguese and Arabic
  • Added Russian language support

Important Bug Fixes

Finance

  • Wrong discount is shown in finance fees page
  • Zero entries are shown for income in “Compare Transactions report”
  • There is no validation when the same periods are specified for comparison while comparing financial transactions
  • Zero entries for income are shown in finance report
  • Indication of mandatory fields in donation page
  • Indication of mandatory fields in fee particular page
  • Show the fee collection name in alphabetical order in refund page
  • Show the Category Name in alphabetical order in reverted transactions page
  • List of batches not shown when an employee with “Finance control” privilege attempts to create fee particulars
  • “Refund” prefix should apply only for receipts of fee refunds
  • After changing active/ inactive batch selected fee collection is not changing in fee collection page
  • Fine selection is not refreshing after selecting “Select category”

Student

  • Gender of archived male student is shown as ‘Female’
  • Change style of advance search result page
  • Change ‘Language’ to ‘Mother Tongue’ in student profile
  • Year is not shown in the previous details of student

HR

  • Active additional details are not shown in archived employee profile
  • Style issue in the subject association page if the employee’s name is too large
  • If employee has “HR Basics” privilege then he can’t search employee (Advanced search)
  • If employee has only “Attendance register” privilege then no need to show Attendance Report link for that employee
  • Redirection issue in payslip page
  • Employee Departments are not listed in alphabetical order
  • Newly created leave type isn’t shown for employee in the dropdown
  • Error 500 is thrown in Employee Attendance Edit page
  • Error 500 is thrown while denying the approved leave

Settings

  • Overlap of Edit and Delete buttons in the student category create page in some languages
  • Change ‘Graduation’ to ‘Batch transfer’ in batch transfer page

Subjects

  • Show the students list in alphabetical order in elective assign page
  • If no student is present in a batch then show a flash message in elective subject page
  • Students could be assigned to deleted elective subjects by directly going to the link
  • Inactive elective subjects are shown in My Subjects page

App Frame

  • Getting 500 error in app frame if we add question mark in URL link
  • No styles added for the user token page

API

  • Invalid Request error in student admission through API
  • Throwing 500 error in the employee API
  • Throwing 500 error in the student fee dues API for some students and due fees is not showing for other students
  • Throwing 500 error in student API

Inventory

  • Font size for ‘Code’ column entries is more while viewing Store Categories
  • Irrelevant error message is displayed when ‘Other charges’ field is skipped while creating a GRN
  • Admin with employee record should be able to raise indents
  • Indent can be raised for ‘Zero’ quantity
  • Unit Price more than 100000 is not accepted while raising indents
  • Translation issue in store_items page
  • Batch number is not shown in the store items list page

Applicant Registration

  • Edit/delete option should not show in case of Applicant registration and Refund
  • Multiple applications are possible with same pin number

Hostel

  • “availability” text is displayed in breadcrumb in Hostel Report page
  • Irrelevant error message is shown when ‘Students per room’ field is skipped while adding hostel room
  • Change the label in the hostel fee defaulters and fee pay page from ‘Select a class’ to ‘Select a batch’
  • If an error occurred while adding a warden then selected hostel name changes
  • “nil error” in the individual room details page while clicking the rooms from breadcrumb
  • “Hostel admin” privileged employee does not have the permission to download the csv report of the room list

Transport

  • Transport edit page does not show the selected route
  • Change the prompt name ‘Select class’ to ‘Select a batch’ in transport fee defaulters page
  • “Transport admin” privileged employee does not have the permission to download the csv report of vehicle details

Fee import

  • There’s no user feedback upon assignment of fee collection to student during fee import

Exam

  • Employee with ‘Examination’ privilege can’t generate pdf report of exam wise report
  • Employee with ‘Examination’ privilege can’t generate csv report of grouped exam report
  • Empty table is shown if no exam exists
  • Wrong calculation is shown in the exam report if we remove the assigned students from the elective subjects
  • Not possible to update the grade to nil, showing error message

News

  • Large images aren’t rendered in compressed form while adding/viewing news
  • Not possible to approve the deleted user’s comments

Attendance

  • Unable to mark student as ‘Absent’ for previous month in daily attendance type
  • The Close button of attendance marking form is not working if the student name is too large
  • Subjects are not refreshing while selecting the ‘select a batch ‘ prompt in the student attendance report

Manage Course

  • Show flash message while assigning and removing tutor
  • If there are no active courses or batches then show message instead of showing blank page
  • Change the privilege name ‘Add New Batch’ to ‘Manage Course/Batch’
  • Values in ‘Subject’ dropdown aren’t shown according to the batch selected

Library

  • Returned books aren’t shown in Library Movement Log
  • Performance issue in tag list
  • In student and employee profile for reserved book, due date is shown instead of reserved date

Placement

  • Calendar shows “January 2014” month by default while creating a placement announcement

Assignment

  • Throwing 500 error while viewing the created assignment

Email

  • User can send Email without subject and message
  • Emails sent in Arabic do not have the ‘powered by’ footer

Timetable

  • Show the batch name in New/Edit timetable page if class timing set (containing class timings) is assigned

SMS

  • If the batch has no students then show a message in sms page
  • Change the flash message and its position in sms page

Employee

  • Permission issue for tutor, subject associated employee and employee having  “Student view” privilege

Custom import

  • Associated data is not shown for some models in custom import
  • Unchecking one associated data unchecks all the selected details in custom import library model

Gallery

  • If an error occurs while uploading a photo in gallery, all the selected users get removed

Document

  • An attempt to delete without selecting document files  throws “Translation Missing” popup
  • An attempt to delete document throws “Translation Missing” popup


Previous Release notes:
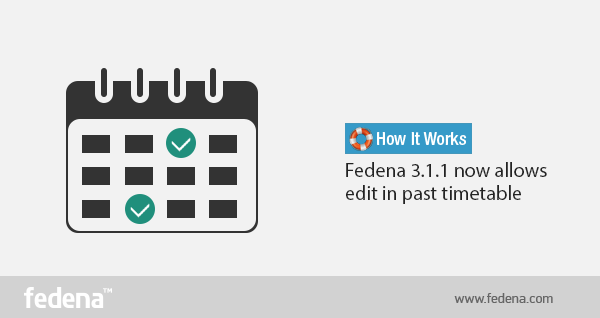
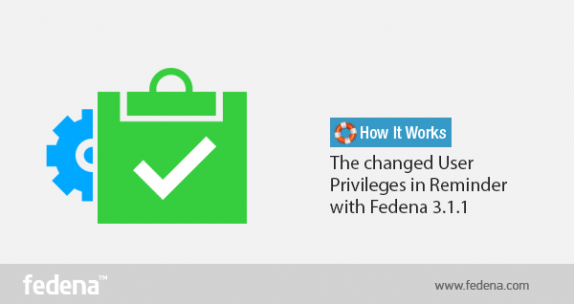
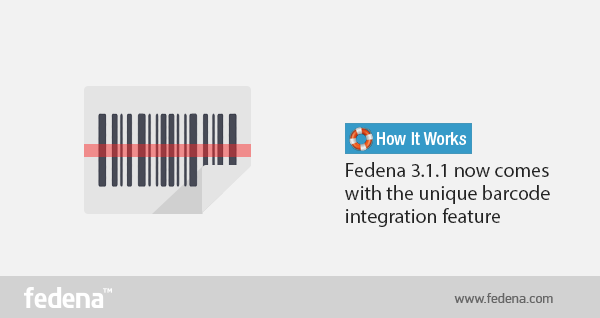
Fedena 3.1.1
Fedena 3.1
Fedena 3.0

Fedena 3.1.1 Now Allows Edit in Past Timetables

Blog-graphics-Edit-Timetable

The latest version of Fedena 3.1.1 has come up with a lot of new modifications and features. Today, we are going to talk about the new Past Timetable Edit feature that allows you to edit any past timetable. Read the article and know how the new change in past timetable can be done.

The Change

During the old scenario, you were not allowed to make any edits in the past timetable. In this case, if you were to make changes for a particular batch for any subject, you had to go through the ordeal of creating a fresh new timetable for it along with assigning of teachers to the changes you make to the timetable. But with the new version of Fedena 3.1.1, you can now make edits to the past timetable.

How to do

Go to ‘Timetable’ in ‘Academics’ when you log in to your Fedena account. You will get ‘Edit timetable’ in it to select. It will take you to the edit timetable page:

timetable_1.png

Select the particular period for which you want to make the changes.

Saint1 - Chromium_327 (1).png
Select the start and end date and click on ‘Edit entries’. You will get the message regarding the edit as shown above.

Note: When you make edits to a particular timetable, you should note that all subject-wise attendances related to the particular timetable (time period) will be deleted.

The changed user privileges in reminder with Fedena 3.1.1

Reminder

 The new Fedena 3.1.1 comes with some important updates in the internal messaging system. In keeping with the varying requirements of educational institutions, Fedena 3.1.1 is now available with some changes in the user privileges in reminder. Read the article and know the scenarios for which the changes have been made.

Scenario 1: Fedena 3.1.1 now allows parents as part of internal messaging system

In the earlier version of Fedena, parents of students were not a part of the internal messaging system. The new updated Fedena 3.1.1 now allows parents to be a part of it. Parents can now view and send messages or reminders to their children and the teachers or tutors associated with their children and their respective classes.

Desktop1.png

Scenario 2: Students are now allowed to send messages to their respective batch teachers and other students

Earlier version of Fedena allowed students to send messages to students and teachers from different batches and courses which was mostly not required for. With the new Fedena 3.1.1, students can now view and send reminders to teachers who are associated with their batch and also to classmates as well. Plus, they can do the same with their own parents.

IMS_2.png

Scenario 3: Employees are divided into normal employee and teacher/tutor

Unlike the earlier version, employees are now divided into normal employees and teacher/tutor. In the case of normal employees, they can view and send reminders or messages to other staffs in the institution and also to students. But they are not allowed to do the same with parents.

IMS_4.png


In case of teacher/tutor, the teacher can view or send messages or reminders to other staffs in the institution, students and parents of the students they are associated with.

 IMS_3.png


Changes seen in Development & Deployment: Experience with Ruby on Rails – Part 2

Ruby

We covered some fundamental changes in environments of Fedena, Uzity and Flux covering CLI commands, Plugins, Gems, Asset pipeline, Bundler, Turbolinks, CoffeeScript and SASS in the  the first part. In this part, we will be covering about the changes seen in some other aspects of development and deployment, like ActiveRecord, Tags, ActionMailer etc.

Action Callbacks

Action callbacks are used mainly to prevent repetition of code in controllers by calling identical codes repeatedly. Rails  offers several action callbacks in controllers like before_filter, after_filter etc across all the three RoR environments we use. New alias methods have been added to action callbacks in rails 4, which enables us to use before_action, after_action etc. instead of before_filter, after_filter etc. However no sign of deprecation of these methods are shown.

ActionMailer

ActionMailer is used to send emails from a rails application. In rails 2.3, i.e in Fedena, ActionMailer is present as a Model. With the release of rails 3, ActionMailer was changed from model to a class and relocated to ‘app/mailers’ from ‘app/models’. This system remained unchanged in Rails 4. Also in Fedena, method prefixed with ‘deliver_’ was used  to send a mail. Calling method name as such is sufficient in Rails 3 and above. Uzity follows this method. ActionMailer has not been used in Flux.

Delayed_job

Delayed Job does not come by default in Rails. Delayed Job is a gem added manually. This was extracted from Shopify. Delayed Job can be used to execute time consuming process like preparing complex reports, sending emails etc. Delayed Job is used as a plugin in Fedena with some customizations. In Fedena delayed job is used to compile some reports, send emails etc. In Uzity, ‘delayed_job_active_record’ is used. This gives more control over queuing and priorities for jobs by naming queues and assigning priority in integer values. Delayed::Job.enqueue is used to append a Job to the delayed job in Fedena. In Uzity it can be done either by Delayed::Job.enqueue or by defining handling method in Models. ‘handle_asynchronously’ can be used to make a method execute as a Delayed Job. Delayed Job is not used in Flux so far.

PATCH Method

‘PATCH’ has been used as a primary method for ‘update’ in Rails 4. Both ‘PATCH’ and PUT are routed to ‘update’. PATCH is ideal for partial updation and for APIs. PATCH is a relatively new standard and what it does is that it applies a delta rather than entire resource updation.

Form Tags

Form in Fedena, used to have form written in a non-output syntax, like

<% form_for ...

This changed to syntax with output(with ‘=’ sign) from Rails 3 onwards like

<%= form_for ...

ActiveRecord Changes

ActiveRecord is responsible for mapping persistent data to ruby classes in a Rails application. It represents the ‘M’, i.e the Model in MVC Architecture. ActiveRecord usually goes through significant changes throughout every major and minor version updates of Rails. Some of such changes we see regularly between the operating environments of our applications are discussed here.

Query Engine

Querying mechanism has changed in Rails 3, increasing the flexibility of code in the controller. Several new methods like where, order, select etc were added. ‘where’ method was introduced, which can replace ‘find’ in queries. where returns an ActiveRecord::Relation. It is a collection of method objects unlike find which returns a single record or find_all which returns an array.

Throughout Fedena we use find and find_all for querying, with conditions specified either in the ‘Rails way’ or in SQL format, and returning data in arrays . In Uzity we got the new, ‘where’ and several other related methods in addition to find. In Uzity we use ‘find’ at some places where we expect the results to be in array format and with less data manipulations. In complex actions, we use the ‘where’ method so that we get an ActiveRecord Relation which we can keep on chaining till the expected result with lesser database calls. With Rails 4 several ‘find’ related methods saw deprecations by introduction of new methods and emphasis on ‘where’. So to avoid deprecation warnings and to be safe with future versions of rails we use the new finder methods in Flux.

Scopes

‘named_scope’ has been deprecated and changed to just ‘scope’ with Rails 3. The ‘conditions’ like we use in named_scopes also have to be changed to relation methods such as where, order etc. as mentioned previously. We use named_scopes and dynamic_scopes in all three applications, but tend to use it in very high frequencies in Uzity and Flux.

Query Chaining

Thanks to the ActiveRecord::Relation returned by latest methods starting from Rails 3, queries can now be chained with ease. The ActiveRecord relations returned by relational methods can be further queried many times. As a result, we tend to use more scopes in the models of both Uzity and Flux for pretty code and simpler and optimized queries. For example, if we add the scope ‘active’ and ‘open’ to the Task model, it is enough to use

Task.active.open.where(:id=>objective_id)

instead of

Task.find(:id=>objective_id,:is_deleted=>false,:status=>’open’)

or further longer

Task.find(:all,:conditions=>{:id=>objective_id,:is_deleted=>false,:status=>’open’})

ActiveRecord Store

ActiveRecord store was introduced in Rails 3.2. It is a simple key/value store. It stores a Hash as text, which is serialized upon load and save. It can be flexibly used to addition fields for a record. ActiveRecord Store is used to maintain notification count in Uzity.

Mass Assignment Controls

Along with the other security fixes, Rails also introduces several methods to prevent end user data. ‘attr_accessible’ and ‘attr_protected’, defined in Rails models were introduced in rails 3 to serve this purpose. These are basically blacklisting(attr_protected) and whitelisting(attr_accessible). This was made very strict by default in  Rails 3.2

With rails 4, a new method called ‘strong-parameters’ was introduced. The attributes are now protected from the controller part rather than from the model part, restricting the flow of parameters to the model. Only whitelisted parameters are permitted the flow. This however caused a lot of troubles dealing with nested forms and uploads in Flux at initial times until we got used to.

Migration Changes

Migrations remains more or less same throughout Rails 2.3 to Rails 4 with less number of deprecations. In Rails 2.3, i.e in Fedena, we had to write separate up and down migrations for each migration. In rails 3, writing ‘change’ migration was enough, but had trouble dealing with ‘change_tables’ and ‘drop_tables’. The change method was preserved in Rails 4 with fixes to ‘change_table’ and ‘drop_table’.

In general, while switching between projects in different versions of Ruby on Rails, it is very obvious that the application development is becoming easier with every new major versions of Rails. Rails 2.3 is like the essence of Rails among the three versions used. If we have experience developing in that environment, we can easily handle the newer versions without much problems apart from the initial lags.

This article is written by:

TP


Sooraj T P
A hard core coder. A gadget freak. An unsung designer. There is hardly anything which Sooraj doesn’t talk about, be it tech, gadget, design, automobile or more. Sooraj is the “Tech Saint in making”.

Everything you Need to Know About App Frame

1bWhat is App?

App is a software that provides a specific and desired functionality. App is built to ease the users/customers of a service provider or product company for a number of desired services. Apps are of various types based on platform dependency, viz. mobile or native apps, web apps.

What is App frame?

App frame is a concept of nesting apps developed in for Fedena. The concept is not something new, apps like facebook already has implemented apps through similar sort of technologies. It basically means, to include an app inside another app. Parent application is provisioned to include another app, this helps user to get functionality which is either related/non-related to parent application. Main advantage of this concept is that, the parent app gets the new functionality meanwhile implementation overhead of the new functionality is taken out of the parent app. Also App frame will be an isolated independent app. Just that it uses parent app like a container to load. App frame can reside within same hosting area as parent app or even can be a third-party app.

In Fedena, App frame  is implemented as a plugin. A Fedena admin user and privileged user can add an app frame. Fedena App Frame is basically an app inside fedena’s frame. An app is an independent application. It resides outside fedena. Fedena loads the app using an iframe. An iframe is used to display a web page within a web page. Iframe is an html tag defined as follows:

<iframe src=”URL” width=”200″ height=”200″ frameborder=”0″></iframe>

here URL corresponds to web url or link of web page or service included as an app frame width, height and frameborder are some other parameters that define the width, height and border of frame area used to display app frame within iframe.

Most interesting thing of using app frame is we can include any other web service within fedena. It gives flexibility and user ease. A fedena user doesn’t need to go outside fedena to access those services. Admin can even add educational games provided online by any third-party

Uploaded by Awesome Screenshot Extension
App Frame Management

Fedena App Frames are very user friendly and hassle free. Fedena admin can add various external apps in fedena as an app frame. From menu user can browse to manage apps. From there can add new apps, edit or delete old apps. Its so simple to use.


Uploaded by Awesome Screenshot Extension

Fedena app frame can allow 3rd party client to become Fedena Oauth clients. This permits them access to internal fedena. Fedena app frames can be made for category of users ie. admin, students, employees and parents.

Fedena OAuth Clients

Fedena OAuth Clients (Apps) are those third party apps, which register in fedena , and fedena authenticates and authorizes the app to use the fedena’s protected  resources. The process are implemented using OAuth2 protocol. For example, a third party client can access fedena student APIs to access student data, process it and show the map with addressed pinned in it.

App frame Limitations

App frame do have certain limitations besides flexibility and user ease. Some are third-party restrictions, some are technical restrictions and some based on UI.

  • Admin can include any web service as an app frame, for which provider has no objection to use their service/app on a third party platform.

  • In case of technical restrictions, restrictions are set by CORS. CORS means cross origin resource sharing, it basically means permissions/restrictions to prevent or allow a service to be used on a third party platform. CORS introduces a standard mechanism that can be used by all browsers for implementing cross-domain requests. The spec defines a set of headers that allow the browser and server to communicate about which requests are (and are not) allowed. CORS continues the spirit of the open web by bringing API access to all. This is used as a means also sometimes by providers to prevent usage as a frame inclusion on other platform or web services. Basically when an app frame is opened, a request goes to respective source of included third-party service. The response request can include an Access-Control-Allow-Origin header, with the origin of where the request originated from as the value, to allow access to the resource’s contents. The user agent validates that the value and origin of where the request originated match. If it matches, app frame will load otherwise app frame will fail to load.

  • UI restrictions are miss-match in user friendliness, designs of framed app. If the app frame has a scroll and you want to make frame scroll less, then a code snippet has to be pasted inside the page being shown. Code snippet can be obtained from the index page of App Frame by clicking on the respective app name. You will be taken into the show page, listing the details of the selected App Frame. Copy paste the client script in the last row and add it in the page being show. Then the page will become scroll less.

App frames are an area which makes freedom for fedena users to add their own chosen apps, without needing them to buy or develop.

This article is written by:

Untitled

Shridhar Agarwal

A coder and only coder. His time goes around his laptop. Coding web apps, websites. He is literally born to develop things he finds missing. There is hardly anything he is not doing. A music lover & a Foodie. ”


Bulk Data Movement with Fedena

Fedena (1)

Data and data analysis plays a vital role in our day today life. Everything we look into is associated with some kind of data or other. Data plays a key role in arriving at any decisions . It support in decision making. In short, data can be defined as information that has been translated into any form that is more convenient to move or process.

Data can be different. It can be either meaningful or meaningless or can be abstract. When it comes to computing, data is the prime component. Every aspects related to computing is associated with some kind of data processing. Conversion of computing problems into executable programs involves analysis, understanding of problem data. Object Oriented Programming makes this conversion much easier by connecting all real world things to objects that have data fields (attributes that describe the object) and associated procedures known as methods.

In Fedena we manage gbs of institution data.  In between fedena’s evolution, we use to get plenty of requests related to data retrieval and data entry. So data management has always been a topic of study.So for the bulk movement of data into and from fedena.Considering the importance of data processing ,what we could do is create an exporting and importing interface. But fedena expands rapidly, its not wise to implement this for every new modules made. So what we needed is an engine to handle data bulk export and import, which can adapt to the changes in fedena easily. Hence we design Data Export and Custom Import plugins which handles bulk import and export of data in a simple manner.

And for the engine design, we exploited the MVC architecture. In MVC architecture the data and logic are separated into different layers. Model represents the physical data in your application. MVC architecture converts the database into model structure with the help of some object oriented principles. Model layer helps in creation and updation of data inside each tables. The data can be captured in the form of attributes and their values of objects. Each tables inside the database will be mapped to one model. We can add more power to the data analysis by creating relationships between data in different tables.

Two engines one handles import and other export. In both we define a particular schema for data for each models. When importing according to the schema the engine creates a csv file which defines headers for the particular model. User downloads it and merges with the data they want to import. The header as I said will be defined by the engine, and the header for a user selected model will be closely associated to the real world object itself. For example a header for Student model will contain first name, last name, admission number, address, batch name etc. While during data export a same schema is set for each models. The user selects the model, accordingly the engine creates export files. The engines makes it easier to extend the functionalities for new module within Fedena.

When it comes to ERP applications data movement has an important role. Almost all ERP applications use extensive set of data for its functioning. The way each of the application process and use data may differ. Fedena custom import and export plugin helps a great deal in data management. Fedena custom import module is primarily developed to move bulk data into fedena. This eases the time consuming data entry process. Fedena custom import plugin supports commonly seen file formats which user can choose as per the requirement. In overall complexity in the data upload is greatly reduced.

Fedena data export module supports the user to export Model data for various purposes. There will be a predefined set of exports (model) available. Model data can be downloaded in either of formats xml or csv. These exported data are of various use. The export operation serves many purposes like backup of certain model, data transfer to some other application, for acquiring meaningful insights from dataset, data driven decision making etc. And overall today’s business, organisational process plannings are based on data. Data is constantly analysed to for evaluation. Different kind of outputs are made out of same set of data. Data exported from Fedena can be used for many of all of those reasons.

This article is written by:

1393660_542978212446375_2117412812_n
Priyanka TP

Somebody who literally cooks code, Priyanka is kind of girl who works smart in kitchen and on computer with the same zeal. And her codes are equally noteworthy as her delicious recipes.

Barcode Integration: A unique new feature in Fedena 3.1.1

Barcode

Fedena 3.1.1 is now equipped with Barcode Integration which can help you deal with library management in your institution. Any new book addition or a book issued or returned by students can be entered. Be it a renewal or the search for a book to know its status can be easily done by the scanning the barcodes of the books. Managing your institution’s library is much easier now with the new feature of barcode integration. Read the article and know what all scenarios will let you use the feature.

Scenario 1: When a new book is added

When a new book is added, go to ‘Manage Books’ in the home page of library and then select ‘Add books’.

barcode_1.png

Select ‘Add Books’ to go to the page where you will add information about new books.

bar code_2.png

There are two ‘Book addition mode’- ‘General’ and ‘By barcode’. Thus, you can add a new book in your library using the barcode of the book.

Scenario 2: When a book is returned/renewed/issued

The barcode integration can also be used in case a book is issued from the library or is returned or renewed. You can keep a track of all the entries with help of the barcode in the book. In case of returning a book, go to ’Return Book’ in ‘Library Management’ page. Store the returned book using the barcode.

barcode_3.png

For issuing a book, go to ‘Issue books’ in ‘Library Management’ and use the barcode to do the need.

barcode_4.png
For renewal, go to ‘Book renewal’ in ‘Library Management’ page and use the barcode of the book for book renewal.

barcode_5.png

Scenario 3: When a book is searched for

The barcode integration can also be used to search for books in your library. Use the barcode of books to look for the current status of a particular book, whether its available or reserved by someone for later issue. For this, go to ‘Search book’ in ‘Library management’ and use the barcode of the book to know the status.

barcode_6.png

10 Powerful Features of Fedena that Makes it the Best Choice for your School

1

What makes Fedena so amazing? Definitely, its interesting features and plugins that give its users a smooth and enriched experience of managing their institution effortlessly. Today, in this article, we will highlight some of those features that makes fedena to stand out of all!


Data Palette: The Future of Fedena: Fedena 3.0 offers an exciting new feature called the Data Palette which when enabled will help you get the new dashboard. The dashlets available on the dashboard are manageable and they get updated in real time. Moreover, information in the dashlets can be navigated according to a desired date.


Custom import now comes with the Bulk edit feature: Another new feature by Fedena 3.1 is the Custom Import bulk editing that allows you to edit custom imports in bulk. For example, if you need to change the blood group for all the new admissions for a particular batch which you have already saved, you can do it effortlessly with the Custom Import Bulk editing, unlike the earlier version that required you to do so on an one by one data basis. Know more


AppFrame plugin: The App Frame plugin by Fedena is of great use, particularly when you want to show any third party application (using Fedena API authentication) to the logged-in user without opening the URL separately in a tab. The plugin lets you do the same in your school’s Fedena account itself. Read more


API integration: The API system for Fedena offers multiple methods of integrating and extending functionality. API is here to assist you in managing teachers and students effectively, enhance their productivity and develop seamless integration with other software. Fedena API or Application Programming Interface comes with an SSO or Single Sign On for better security. Know more


Data export plugin: Worried about exporting data from Fedena and storing them in your system for further use? Fedena’s data export plugin would facilitate in exporting data. You can store in data in CSV or XML format by exporting them from Fedena and keep them in store for future usage.


Consolidated reports of school via the report center: You can avail a CSV file for all possible reports, thus letting you get access to a whole lot of data. So, whether its a detail of all the students or the batches and courses that you have in your institution, you can have a report of it in the CSV format anytime.


Sign in with your google account: Fedena’s Google app integration lets you use your Google account to login to your Fedena account. All your worries of forgetting your Fedena login details now has a smart solution. Use your Gmail account to login and use your Fedena account. For more details, click here.


Registration plugin with Payment gateway integration: Applicants to your institution can now pay their fee instantly for registration without coming to the institution physically to do so. The registration plugin of Fedena is now equipped with payment gateway that lets a student pay online for registration to the institution.


The barcode integration: Now you have a smarter way to keep a track of all the library books using the barcode integration. Any new book added or a book being allocated to anyone in the institution can be kept in a record with the barcode integration. A time saving feature that can save you from spending hours noting down all book entries.


Custom report: The interesting custom report plugin by Fedena can help you to create report card of students or employees on the basis of particular information. For example, you can create a report of students who belong to the blood group B+ along with their first names, date of birth and gender. Just select the respective info based on which you want the report. Know more.


2 Secret Features


Action search: Having problem with Timetable creation or extracting Fee Defaulters list? Your solution is the Action Search that is available in the top right-hand side. This innovative feature let the users to get access to various other features through a simple search. All you need to do is to type what you want to do with Fedena and get all the matching actions listed quickly.


The Language Switcher: One of the least known features of Fedena, the Language Switcher allows each of the users to chose their own specific language to use Fedena, even if English is made the default language by the admin. Users can switch to the language of their choice from their profile at the top-right menu, left to logout button. So, you can use Fedena in Spanish even if the main system is in English. Learn more


2 Latest Features

Form Builder: An upcoming feature by Fedena, the Form Builder helps in creating forms and sharing it with fedena users. The forms can be created by the admin or the privileged user and can be used as feedback from students about the classroom teaching and others.


Classroom allocation: Another interesting feature coming up very soon in Fedena is the Classroom Allocation with which you can allocate classroom for any particular subject to students and teachers as well. Based on a timetable entry, classroom can be allocated on a weekly or a specific date basis. After a room is allocated using the drag and drop method, the same can be done for students and teachers to complete the process.


Click the Contact us button below to get Fedena for your school. You can also write to us directly at: info@fedena.com or call: +91 8030 7528 12

Fedena UI Redesign: Case Study

Fedena-UI

Overview

Fedena is used by thousands of schools and millions of users worldwide, and it is considered really user friendly app. The simplicity in design and easy to use interface, makes Fedena stand out from similar tools.

But the increasing number of features in Fedena and the changes in worldwide design trends, made us think that the time had come for a facelift.

Problems with the Earlier Design

Fedena-Old.jpg

Too many features, uncategorized:

Like any other app, features in Fedena have been increasing since we started our journey. The market study, research and innovations from our team and also the interactions with clients,  give us a better understanding on what additional features are required to make Fedena more efficient.

Currently Fedena has more than 50 modules and external plugins. For a user, it is a tedious task to browse through all of them in the dashboard and find what he/she is looking for. We were also not happy about the very long ‘More’ menu where the rest of the features were shown due to space issues.

Sub menus are not easily accessible:

Most of the entries in the dashboard had submenus, and some of them were further divided. In order to access them, the user had to click the icon and go inside the module.

No options to monitor day to day activities and data:

This was more like a requirement than a problem. The easiest way to know what is happening in the institution today, is the one place where we show all the daily activities and statuses like examinations, fee due, online meetings, discussions etc, without browsing each module. Fedena had no such feature.

Outdated design:

Despite being simple and easy to use, the main design pattern we followed was a little old, and tried & tested in several apps. The days of big colorful skeuomorphic icons and background patterns are long gone. So a user who is aware of the internet standards and current UI design trends, might have felt Fedena design outdated.

Key Focus while Designing

Efficiency over features:  Priority should be on ‘how it works’, rather than ‘how it looks’.
Aesthetic and meaningful data presentation: Give the user relevant data from time to time.
Giving control to the user: User should be able to decide what he/she wants to see.
Minimal design: Design should be light, simple and to the point.

Keeping these things in mind we started planning. Studied several apps, from amazon api, salesforce and desk.com to even e-commercial websites, to get best possible options to solve these problems. So many designs were tried, tested and scrapped. And finally we came up with this design:Dashboard.png
and it turned out to be a never before seen menu and dashboard view.

Navigation Bar

Navigation.png

The revamped navigation bar now consists of a menu button, link with institution name which acts as a backlink to the dashboard, search area, messages and a user preferences icon. Everything is arranged in such a way to make the best use of the space.

Menu button: One click to get them all

Menu.png

All the module menus have been stacked neatly under one single button. Wherever you are in the app, you can access any other module by just a click in the menu button.

Categorising the Modules

We have grouped them according to their nature under different tabs. For example, if a user wants to access Examination module, he/she just needs to go to the Academics tab. No longer scrolling through the big list of modules.

Easily accessible sub menus

Submenu.png

Place the mouse over a module and the submenus will appear. This has reduced the number of clicks required to reach a feature the user wants.

User Controlled Quick Links

Manage-quick-links.jpg
The quick links tab gives the user the freedom of bringing favorite modules under one tab. By clicking ‘Manage quick links’ user can control what all features need to be there in the quick link tab. He/she even can control the sub menus that appear on quick links.

Wide Range of Clean Monochrome Icons

Icons.jpg

The big colorful icons were the face of Fedena. But as the part of bidding adieu to the old school design, we had to chuck the ‘iconic dashboard’.

The new set of icons are modern, pixel perfect, more precise, and go along with the updated user interface.

The Consolidated Dashboard

The idea is to give the user the most possible data relevant to him when he/she enters Fedena. This reduces the time taken for daily monitoring, and makes sure the user never misses any important data.

Dashlets.jpg

There are several ‘dashlets’ and from which the user gets an insight of what all activities are happening in the institution on that day and he/she can also switch the dashlet to any other date. Activities like birthdays, events, examinations, discussions happening all can be accessed at a glance. Also the day to day statuses of finance, students, and employees can be monitored. The data shown in the dashboard palettes differ from user to user, based on their privilege.

Manage-dashlets.jpg

The user can sort the dashlets by dragging them. And clicking the ‘Manage Dashlets’ button helps the user to control what should appear on the dashboard.

Implementing the Design

Finalized designs were given to development team and they did a fantastic job on giving life to the visuals. The results were exactly what we had planned, thanks to the pixel perfect front-end and smooth back end coding.

Future Plans

With the new dashboard and menu design, we have completed the first phase of Fedena redesign process. Since Fedena is a vast application a complete redesign is a time taking work. New features in Fedena are being made in compliance with the redesigned dashboard. Soon the entire app will have a new look.

Another major upcoming plan is to implement an ‘Analytical dashboard’, where the user will get visual data on institutional activities through graphs, charts and infographics. Comparing and consolidating data will be more easier and efficient in future.

Our aim is to make Fedena more vibrant and strong.

This article is written by:

Devi-display-picDevi Prasad

Or Devi like everyone calls him, is a multidisciplinary designer and artist with an eye for innovation and pixel perfection. Spends most of his free time sketching, surfing the cyberspace for inspiration and watching movies.

The New Revert Batch Transfer Feature by Fedena 3.1.1

Blog-graphics (4)

The new version of Fedena 3.1.1 now, allows you to revert a batch transfer that you have already done. What is the advantage of this feature? Well, there are times when some errors are noticed after a particular batch has been transferred to the next level. And this is when the revert batch transfer feature comes to your rescue. Revert the batch and fix any issues associated with the batch transferred. This is one feature was absent in earlier version of Fedena 3.1.

To revert batch transfer, you need to login to your account and go to ‘Administration’ in the menu. Click on ‘Administration’ and you will get ‘Settings’.


revert batch_1.png


Select ‘Manage Course/Batch’ to go to ‘Manage Batch’.


revert batch_2.png


‘Manage Batch’ will take you to the page where you can use the revert batch option.


revert batch_3.png


To revert any batch transfer, select ‘Revert Batch Transfer’ and go to the respective page.


revert batch_4.png

Select the particular batch for which you want to revert the transfer and you get details of the transfers that you want to revert. Once you select the transfers, select ‘Revert selected’ and you are done with your revert batch transfers. To check if everything has been done correctly, you can go back to the respective batch to check if the revert process has been done correctly.

P.S: In case of revert batch transfer, there should not be any dependencies in order to make the transfer smooth.

Custom Import Bulk Edit with Fedena 3.1

BG

With the earlier version of Fedena, the user was not allowed to do editing in bulk and in case, anything required changes, it had to be done one by one. Suppose, if you needed to change the blood group for all the new admissions for a particular batch which you have already saved, you had to go through each and every data to make the necessary editing. But with Fedena 3.1, you are allowed Custom Import bulk editing which allows you to edit custom imports in bulk. Read this article and know how you can edit in bulk for custom imports.

Login to your account and go to ‘Custom Imports’ in ‘Data and Reports’ section in the menu links.


custom_edit 1.png


Selecting ‘New’ will take you to the ‘CSV Data Import’ page.


custom_edit 3.png


Give a new name to the CSV file and select the particular model you want to make the edit. Once you are done with saving, go back to ‘All Exports’ and select ‘Export CSV’ corresponding to the particular report.


custom_edit 5.png


‘Export CSV’ will export the particular file for you to make the required editing. Once you are done with the editing, you can upload the file using the ‘Bulk edit’ option.


custom_edit 4.png


Select ‘Bulk edit’ and you can upload the edited CSV file.

Flexibility of Fedena Examination Module – Part 2

Fedena-Exam-Module-Part2In the last article we dealt with the major building blocks which attributes to the Flexibility of the Examination module. As we progress into the second version of the article we will have a brief idea about  the Implementation of  Examination module in real time. The additional available grading systems: CCE, CWA & GPA helps to take the actual reports. Lets go on a quick swivel of how these reports look like.

CCE

In strict adherence to the CCE grading system by CBSE, Fedena takes care of the creation of assessment via Subjective Assessment and Formative assessment for the overall evaluation of a student. One can create Term-wise Examinations and the respective Descriptive Indicators and Observation groups to get a full fledge report of a student under the two major heads – Scholastic and Co-scholastic. The exhaustiveness of a report purely depends upon the parameters created by the user. After the required set of configurations are done, the exhaustive report can be generated.

screenshot3.png

CWA

CWA(Course weighted average) is  one of the most widely used grading system. Here the users have to assign credit hours to subjects. Then the marks  scored by the student helps the system to calculate the final transcript by multiplying the score  with the credit hours. A final transcript of report would look like this.

screenshot2.png

GPA

The only major difference between a GPA and CWA grading system is that the GPA uses grades instead of marks to calculate the final transcript. These grades can be created from the grading levels of  Exam settings which will be used along with the credit hours to give us a decent report like this.

Saint1.png

Normal Grading System

As mentioned in the last article, the Normal grading system is the generic grading system to fit into  any model of grading system.We can even connect the exams by assigning a different weightage to each examination being held during the academic year.So may it be a Monthly test or a Half-yearly, we can assign each exam a different weightage to get a final transcript like this.

screenshot_111.png

What serves as additional perks to the reports are the amazing features in the Exam settings like the Grading levels, Class designations and Ranking levels.

While the grading levels helps you to make an ala carte grading set  for each batch, the class designation can  give the final one word result for the student’s score like  First Class, Second Class and Third Class or failed.Taking the evaluation to a whole new level the Ranking levels sets up criteria to classify students by taking the marks scored in each of the subjects.

screenshot7.png

Being Equipped with a stock of all the above features, Fedena can help you to generate exhaustive reports of your choice, if the relevant features are used wisely.

This article is written by:

1185742_10200807421647862_134988297_n


Sandeep Panda

An optimistic techie with special interests in implementing technology in real life situations with  a curiosity for the lesser known technical stuff. An individual who can adapt to cross-cultural environments with ease.