Introducing Fedena 3.3

Fedena new release

As a part of our effort to provide our customers with the best of experiences of Fedena, we have come up with a new updated version of Fedena 3.3. This new version promises you a quality management software for schools and colleges with richer user features. Follow the release note below to know more about the latest version.

Write to us for your valuable feedback and any further information at info@fedena.com.

Core Features

Force deletion of student in case of data dependencies
Fee Headwise Report
Remarks Module
ICSE Grading System
Multiple Fee Payment and Particular-wise Fee Payment

Addons

Sales in Inventory
Interswitch Payment Gateway Enhancements
Color Themes

Language Updates

Added support for Gujarati and Turkish

Issues Fixed

E-mail

  • Scheduled job fails for E-mail Alerts
  • Remove “Send Email” option for parent
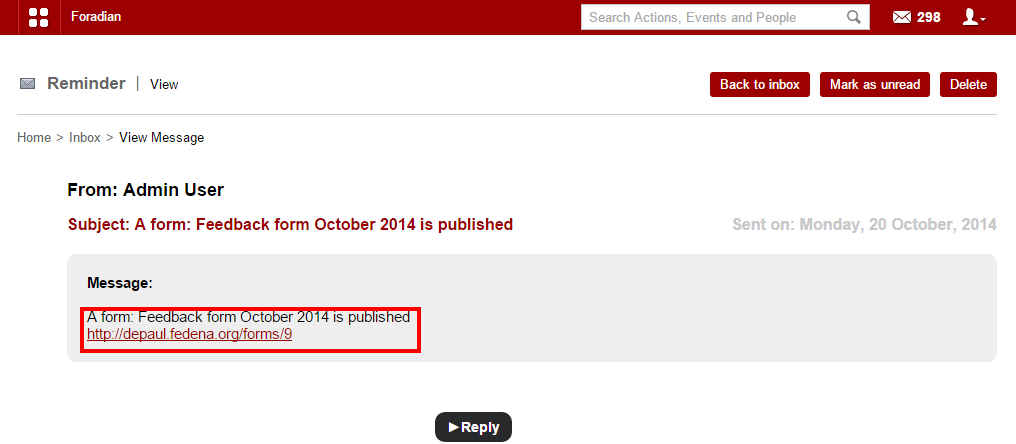
Reminder

  • Page load time is very high during reminder creation

Users

  • Style issue in employee profile page

Students

  • If no student is present in a batch then show flash message inside the elective subject assignment page
  • Selected date changes upon encountering an error in Student Admission page
  • Student Additional Details record does not get deleted when a student is deleted
  • Batch name is not shown in archived student profile page

Dashboard

  • ‘Administration’ tab is not shown for user with ‘Manage course/batch’ privilege
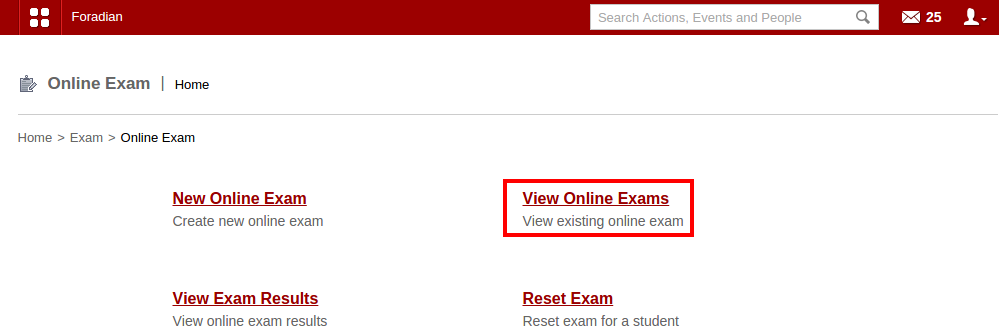
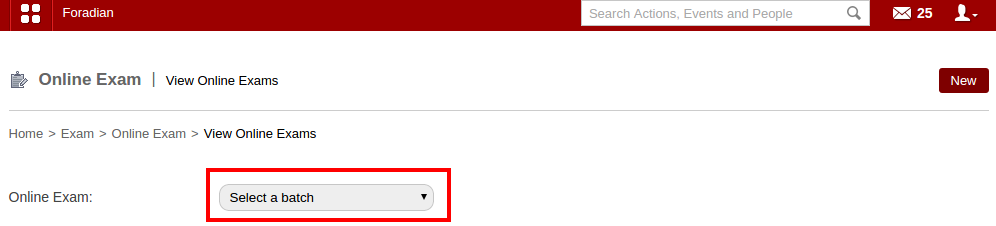
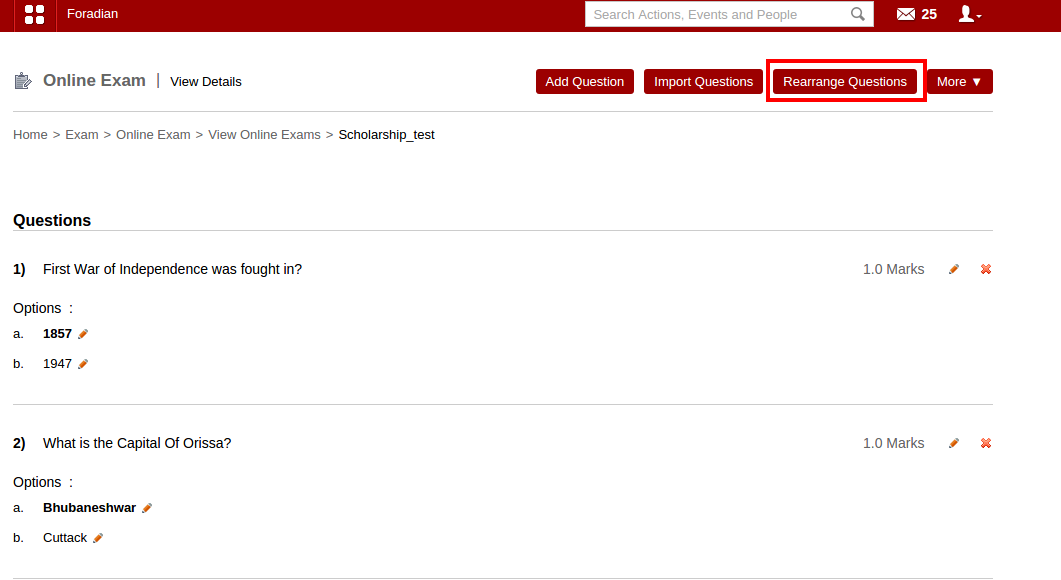
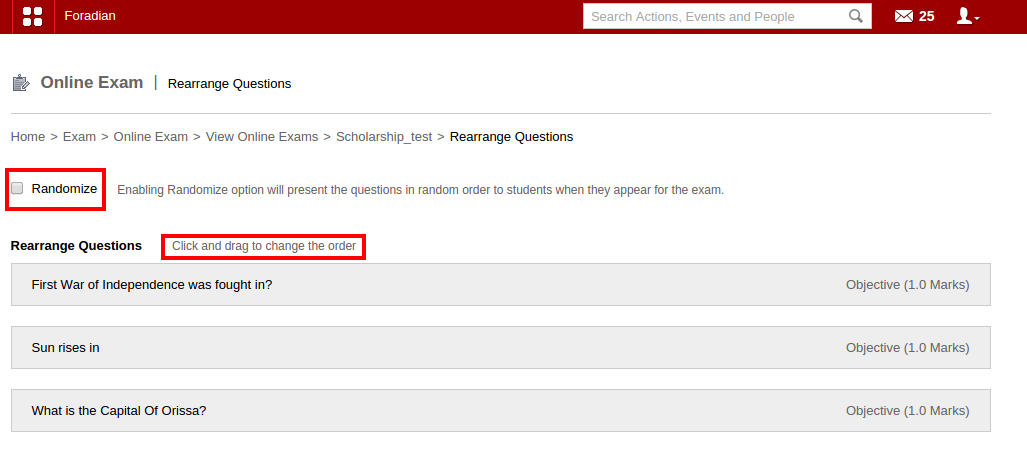
Online Exam

  • Online exam for which end date has elapsed could be published
  • Online Exam option should not be shown in parent login

Applicant Registration

  • Unclear flash message if the batch does not contain all the subjects as chosen in Applicant Registration page
  • Same student could be allotted a batch more than once with same admission number in Applicant Registration page
  • Change  the name ‘Download’ to ‘View attachment’ and open the attachment in a separate tab in View Applicants page

Attendance

  • Marking attendance prior to admission date is allowed
  • No SMS is sent and reason is blank in the email in case of rapid attendance
  • Duplicate batch name is shown in Attendance Register page

Custom Import

  • Unable to import exam score in Custom Import
  • Guardian custom import has no validation

Reports

  • In Examwise report, ‘PDF report’ button to be renamed as ‘Consolidated PDF report’
  • Teacher has no permission to view CSV report for Grouped Exam report

Events

  • During event creation for employees, “Select a Course” label is shown for department selection

Finance

  • Salary account details is not shown in Finance Compare Transaction page
  • Remove the title ‘Delete’ from the Master Fee Category listing table
  • In Finance Category page, sort order changes to ‘oldest-first’ after a category is created
  • ‘Payslip Date’ to be changed to ‘Payslip Period’ in Employee Payslip page, including PDF
  • Inactive payroll category is shown in View Payslip page
  • ‘Amount to pay’ is shown wrong for student fees
  • Discount is shown incorrectly while viewing fee collection
  • Discounts of former students is shown in the Discount list page
  • Total fees in the fee structure PDF is shown wrong
  • In ‘Finance reports’, transaction accounts from unassigned plugins are shown for new schools
  • Negative value is shown for ‘Amount to pay’ in the fee defaulters page after fees is paid
  • Reason is not shown in the PDF report of rejected payslip
  • Student category cannot be changed if unpaid fees exists for that student

Hostel

  • Error 500 is thrown after allocating student to hostel
  • Even though room rent is more than 9999.9999, unpaid hostel fees in student profile is shown as ‘9999.9999’ only

Transport

  • Even though bus fare is more than 9999.9999, unpaid transport fees in student profile is shown as ‘9999.9999’ only

Inventory

  • GRN PDF does not show ‘Grand Total’ value
  • Alignment issue in indent creation page
  • Items from deleted store are shown in search results

Mobile

  • Mobile View Fee Status does not show any information

Library

  • Alignment issue in book edit page

Online Payment

  • Unable to repay after a reversal

General

  • Parent can access all the pages that student can access
  • Should not allow to select elective subject from parent login

Apps

  • Unable to access apps in case of Hindi & RTL languages

Examination

  • Multiple exam score entries are shown for the same student and same exam

Previous Release notes:
Fedena 3.2
Fedena 3.1.1

Fedena 3.1
Fedena 3.0

The New Analysis and Reports Feature in the Form Builder Plugin

Reporting

We had discussed about how you can create and publish feedback forms using the Form Builder plugin in our last article. Today, we will see how the new Analysis and Reports feature works in the Form Builder plugin.

The main objective of this new feature of analyzing and extracting reports is the fact that at times, you might need to analyze the feedback to come to conclusion on the performance of any teacher. This is when you need the Analysis and reports which will help you do the required analysis and extract necessary reports.

How can you extract reports and do analysis of feedback forms?

For this, you need to go to ‘Manage forms’ in the ‘Forms’ section.

analysis_1


Choose the particular form you want. Once selected, it will take you to the particular form submission page.

analysis_2

You can get a preview of the particular form you want using the ‘Preview’ option. When you select ‘Consolidated report’, you go to the ‘Consolidated report’ page.

analysis_3

You get a consolidated report on each of the target along with all the categories under which the target is rated in the feedback form. Moreover, a detailed report on the weightage can also be obtained as shown in the screenshot above.

For analysis, select ‘Analysis’ and go to the page to get a detailed analysis for each of the target.

analysis_4

A detailed analysis as you can see from the screenshot above. Moreover, you can export the result of form submission in CSV format also!

Note:

There is something called ‘weightage’ which allows you to enter weight for the options available under each question in the feedback form. It will show the ‘weight’ or the amount of importance each option carry. Here, in the above screen, as you can see ‘weightage’ is mentioned as ‘wt’. You have to mention the weightage during the time of form creation.


10 (1)


Weighted average = Σ(wt)i(n)i/Σ(n)i

Wt = Weightage

n = Number of submissions for the particular option

Σn = Total number of submissions for the questions


11


Average of weighted average = (Σ((wt)q*100)/(max*(wt)q))/nq

(wt)q = Weighted average of questions

nq = Number of questions

Create and publish feedback forms using Form Builder plugin

Form-builder


With Fedena 3.2, you can now enjoy a very new and exciting plugin called the Form Builder. One of the biggest advantage of this new plugin is that it helps you create feedback sessions in your institution. Create and publish feedback forms in few simple steps which are mentioned as you go through the article. Read on to find how you can create and publish feedback forms easily.

Create feedback forms as an admin or a privileged employee

When you login to your Fedena account, go to ‘Forms’ in ‘Collaboration’. From there, you need to go to ‘Create form templates’ where you need to create the new form template. 

form builder_1

Drag whatever fields you want in your form template from the left column to the right one as shown in the above screenshot with the arrow. ‘Save template’ if you want to use the same template again in future. Else, ‘Use’ button will help you to use the template for the particular feedback session you want. Don’t forget to give a name to the form at ‘Form name’.

You have to create the form, put in all necessary information and for which, you have to go to ‘Form templates’ and select the respective template.


form builder_3


Fill in all necessary information to complete creating the feedback form. Once you are done with creating the form, you can go to the next step.

form builder_2


Before publishing the form, you have to select whether its a feedback form and also the recipients from the particular department and batch. Also, you can select if the feedback is meant only for students or parents or both.

When a student login to take part in the feedback

The students who are assigned to take part in the feedback session, will get message. Once selected, it will help in viewing the message.

form builder_4


Click on the link to go to the form and fill it up.

form builder_5


Once the form is filled, click on the ‘Submit’ and it will go the admin.

Login as admin to see responses for the feedback session

The admin can see the responses by navigating through ‘Manage Forms’. Click on the particular form to go to the form submission page.

form builder_6


You can extract the responses as CSV file or go for ‘Analysis’ also. Thus, an easy and smart way to conduct a feedback session at your institution.


Re-arrange and randomize questions in Online Exams with Fedena 3.2

Rearrange-Questions
Conducting various type of exams often require you to frame questions and rearrange them for each question paper. And this task is without any doubt, much hectic, rearranging the questions for all the students. But with the question re-arrangement and randomize option, you don’t have to spend your time doing the same yourself. Read the article and know how you can use the options for examinations.

How to do it

Arranging questions takes place in two types- rearranging it yourself and using the randomize option.

In case the questions are arranged manually

Login to your Fedena account and go to ‘Online Exam’.

1

Select ‘View Online Exams’ and go to the respective page to select the particular online exam where you want to make the new updates with arrangement of questions.

2

Select the particular online exam to do the modifications. Once you select the particular online exam, it will take you to the particular online exam detail page.

3

The ‘Rearrange Questions’ option lets you rearrange the questions according to you.

Using the ‘Randomize’ option

When you don’t rearrange questions manually, use the ‘Randomize’ option.

4
Just select the ‘Randomize’ option and the order of the questions will change every time a different student appears the exam. Thus, a perfect help for conducting different type of exams.

Classroom allocation made easy with Fedena 3.2

Untitled-2

Earlier version of Fedena didn’t allow its users to allocate special rooms for different classes. Hence, developing classroom allocation feature was something on high priority and finally, the feature has been released in the newer version of Fedena 3.2. Classroom allocation allows you to create separate classroom for conducting classes.

The earlier version of Fedena allowed you to view the timetable which showcased what subject is to be taught, who is the assigned teacher and the time schedule for which the class is allocated. But, in the earlier version, the concept of allocating classroom and building for the particular class to be taken was missing. With Fedena 3.2, you can now know where the class is supposed to be taken. Allocate building and classroom too, for the particular class to be conducted. Read the article and find how you can create and allocate classroom.

How Does the Feature Work

Login to your Fedena account and go to ‘Timetable’ in ‘Academics’.

1

Select ‘Class Room Allocation’ and go to the ‘Class Room Allocation’ home page.

2
Select ‘Manage Buildings’ to add new building and new classrooms to allocate to respective classes.

3
Create a new building and rooms by filling in the necessary information. You have to name the new room and also mention the capacity of each room in the building. Add any number of new room with the help of the option ‘Add field’. Once you are done with creating new building and rooms, you can go to ‘Allocate’ in the ‘Classroom Allocation’ home page.

4

Select the allocation type- Weekly or Date specific. Also, select the particular timetable to which you want to allocate the classroom.

5

The above screenshot shows how to allocate classroom in case the allocation type is weekly. Select any of the day as well as the building and the particular room and drag it to the subject, as shown by the arrow.

6

This above screenshot shows you how to allocate classroom when the allocation type is date specific. The rest you have to do the same with selecting the building as well as the room and drag it to the respective subject, just like you have done in the scenario shown above.

Note: The main difference between the two types of classroom allocation is that, when the weekly format is chosen for a given period of time (suppose from 1st November to 30th November), the timetable range along with the assigned building and classroom for each of the day in the week will be same throughout (in this case, from 1st November to 30th November), unless it is overridden by the date specific classroom allocation. Date specific classroom allocation can override the weekly classroom allocation for the particular date.

The New Change in Class Timing Interval with Fedena 3.2

timing
Earlier version of Fedena allowed the users to set class timings, only at 5 minutes interval. Hence, class durations were set at the multiple of 5, i.e, 5 minutes, 10 minutes, 20 minutes, etc. But with Fedena 3.2, the class timings can be set for any time limit and it may not  necessarily be a multiple of 5. Thus, being an user, you can now set the class timings for any time period- a class can be of 41 minutes, 52 minutes, 23 minutes, etc. Read on the article and find out how you can set class timings with the new changes.

How to do

Go to your Fedena account and go to ‘Timetable’ in ‘Academics’.

SS1
Select ‘Set class timings’ to go to ‘Manage class timing sets’ page.

SS2

Go to ‘Class timing sets’ and select the particular class timing from the list.

SS3
Class Timings’ will take you to the ‘Manage class timings’ page.

SS4
Click on ‘Add’ button as shown in the screenshot above.

SS5

You can set the class duration of any time limit. It need not have to be in the multiple of 5. The class duration can be of any time duration, be it 15 minutes, 18 minutes, 42 minutes, etc.

Smarter solutions to age-old problems in institutions by Fedena

Smarter-Fedena

Technology is changing not just the way we live; but how education is imparted as well. Education and learning have come up a long way and educational institutions too, are paving way for technology to take over and enhance learning at the institutional level. And adopting education management software is one big step these institutions are doing towards revolutionizing education. Today, we bring to you some areas of operation in an institution that can be enhanced and modified by adopting education management software, like Fedena. Fedena, the awards winning education management software has been playing an important role in revolutionizing education, learning and institutional management. Read on to find out what are the areas of improvement for educational institutions with Fedena.

Problem: Teacher’s spend most of the class time taking attendance. Hence, a chunk of productive time in class is lost in attendance marking manually.

Solution: Smart attendance with the help of Alndra Smart Attendance plugin, integrated with Fedena will let you take the attendance in as less as 10 seconds! The plugin enables image processing technology to record attendance of classroom minus the manual work.

Advantage: Teachers can now invest more time in teaching and learning activities.

Problem: Creating intelligent reports, customized according to various requirements demand immense manual work which at times becomes impossible and time consuming.

Solution: Creating not-so-typical reports made easy with the custom report plugin by Fedena.

Advantage: Customized reports give an insight to student performance and capabilities. Hence, teachers can act accordingly. 


Problem:
Tracking and managing expenses in an education institution at times becomes confusing, particularly when the expenses are variable and keeps on changing monthly.

Solution: Fedena allows easy management of these kind of expenses using a unique way of storing up information on these expenses.

Advantage: Managing these expenses under different categories is more systematic and easy to regulate expenses. 

Problem: Student tracking is often considered to be a genuine problem in government run institutions where there is lack of proper monitoring of students.

Solution: Get a biometric attendance system or RFID student tracking system and integrate with Fedena and see the wonders.

Advantage: Easy to install, use and highly scalable biometric technology can bring in good results for the rising number of missing students and teachers in government and community schools. 

Problem: Maintaining large number of students and employees with varied transportation details is a tough task for the assigned employee.

Solution: Transport plugin by Fedena to manage everything important related to transportation.

Advantage: Properly managed vehicles, transportation routes and fees for various students and employees stored in one system. 

Problem: A smarter way to library management, easy to manage books being issued, returned or any added new.

Solution: Fedena’s barcode integration for updating book records in library.

Advantage: Whenever a new book is added or an one issued or returned, everything is managed by scanning the barcodes of the books. 

Problem: With technological advancement, schools are going the virtual way and online exam is the need of the hour.

Solution: Online exam plugin by Fedena for all kind of online exams- objective, descriptive as well as subject-based.

Advantage: Specific online exams for students who are not present physically in the class. Perfect for online courses or virtual schooling. 

Fedena 3.2 Brings you the Import Question Feature in Online Exam

Blog-graphics1

In the last article, we have talked about the new updates and features in the Online Exam plugin with the newer version of Fedena 3.2. Today we take up a new feature in the Online Exam plugin which is called the Import Question. Read on the article to find out more about the Import Question feature.

Import Question Feature

The basic point of the Import Question feature is that it allows you to import questions from any last exam of a particular batch. And it can be done both in terms of exams which are ‘General’ in nature as well as of those based on any particular subject. To check out how the feature works for exams and questions which are ‘General’, login to your account and go to ‘Online Exam’ in ‘Examination’. Go to ‘View Online Exams’.

import_1.png

Go to ‘View Online Exams’ and select the batch for which you want to make the changes in the question paper and import questions.

import_2.png

Select the particular exam you want to modify.

import_3.png

The ‘Import Questions’ when selected will help you with importing questions from previous exam.

import_4.png

Select the question you want to import from the panel on the left and as it shows up in the right, click on ‘Import’. But you have to fill in the marks for the question as well before you ‘Import’ the question. And you are done with importing questions for exams which are ‘General’ in nature.

In case of exams which are subject based, questions will be subject specific only. To import questions for this kind of exams, you have to first select the particular exam for which you want to do the import question option.

import_5.png

As the screenshot shows, you have to select the ‘Course’, ‘subject code’ and then select the question you want to import. As mentioned earlier, you have to fill in ‘Marks’ allotted to the question before importing the question.

Any good or important question from previous exam you want to be part of a current exam, you can now do it easily with Import question feature.

New Updates in Online Exam Plugin with Fedena 3.2

Blog-graphics-Exam-Plugin
The new version of Fedena 3.2 has a lot to offer to its customers for a better user experience. And some major changes and updates have been done to facilitate such experience, Today, in this article, we will focus the changes and updates that have taken place in the Online exam plugin. Read on to find out the new updates.

Update 1: In the earlier version of Fedena, the online exam plugin allowed only exams which were general in nature and were mostly batch specific exam. That means, exams were only related to a particular batch and were not subject specific.

With the newer version of Fedena 3.2, exams can be created based on subjects as well. Hence, it becomes easy to create separate exams based on subjects.

online_1.png

When you select ‘Subject Specific’ exam, you need to select the particular batch to which you will be asked to select the subject as well as the students who are supposed to appear for the exam.

online_2.png

Note: When you select an elective subject, the students who have the particular elective subject will be able to appear for the exam.

Update 2: There has been a new update in the ‘Exam Format’. Earlier version of Fedena didn’t allow you to go for descriptive type questions. Only objective questions for exam was allowed. But Fedena 3.2 allows you to conduct exam with descriptive type question/answer pattern.

online_3.png

When you select the ‘Exam Format’ as ‘Hybrid’, it allows you to frame subjective type questions. And it also requires you to assign evaluators who will be checking the answers for the questions.

online_4.png


As shown in the picture above, you can assign as many evaluators you want. Only employees can be assigned as evaluators. Employees who are assigned as evaluators can see the link to the page for evaluation under ‘Academics’ when they login to their account.

online_6.png

This is how an evaluator marks an answer sheet of a student.

Update 3: When you select ‘Objective’ as ‘Exam Format’, the earlier version of Fedena offered constant number of options for answers. Fedena 3.2 now allows you variable number of options as answers. That means, you can have different number of options as answers for different questions.

online_5.png

Add as many options you want as answers. Plus, you can remove any option if you want to.

Update 4: Students, in the earlier version of Fedena, were not allowed to see their marks of exams they have attended. Only admin could see the marks. But with Fedena 3.2, students can not only see their marks, but check their answer sheet as well.


online_7.png

A lot more features on online exam will be published in the coming weeks. Stay tuned.

Smarter Ways to use Google Forms in Classroom

Google-FormsGoogle has successfully made its way to classroom. It has come up with a lot of tools to accelerate growth in learning and offer better teaching experiences. In fact, Google has a whole lot of products to offer including the new Google Classroom which is a great option to a perfectly organized classroom. Google Docs and Google drive are other effective tools for creating and sharing, hence something to look out for in classroom teaching. Today, we are going to talk about the Google forms and how Google forms can be used in classroom in the most effective ways.

Google forms is a very prominent feature of Google Drive and there are plenty of smarter ways teachers or educators can utilize them to make the most in classroom teaching.

  • Google forms are ideal for conducting a survey in the class. Communicating with students on regular basis is difficult without the use of proper medium to do it. But the importance of these kind of surveys cannot be ignored too. It not only creates a good teacher-student communication but also motivates students to offer their meaningful feedback and hence, let the educators evaluate the ways to effective learning.


  • What better ways can be to use google forms than a contact information collection form. Get your students fill their details in the form that might be crucial piece of information. A good way to know more about students and parents for future communication. These information are important particularly when you can save yourself from the tedious task of entering data. Everything can be done electronically, why the point of wasting time in doing the same manually again and again.


  • Student assignments are easy to collect with the help of Google forms, particularly when students have to attempt exploratory questions. Everything can be kept in one place as you can easily store all information about classroom projects like web links of blog post, video posts and others at one place. Managing projects is an easier task now.

A great help for assignments, keeping a track of grades and a feedback form, Google forms are perfect assistance to classroom teaching. There are a whole lot of other new ways that you can explore by yourself and employ in classroom teaching.

Check out the video showing some good ways to use Google form in classroom.

Fedena 3.2 Brings you the Rapid Attendance Mode for Faster Attendance

Rapid-attendance

A newer version of Fedena 3.2 has recently been launched and it comes with various new and improved features for a better user experience.

The older version of Fedena didn’t allow you to mark the attendance of any student as absent without giving the reason for absence. But many a times, the reason of absence are not known to teachers and in that case, it was not possible to mark any student as absent. But with the newer version of Fedena 3.2, there is a solution to it- the rapid attendance mode. The rapid attendance mode allows you to mark the attendance of students instantly without the option of reason of absence coming up every time you mark anyone absent. In the earlier version, the entire process of marking the attendance was taking place in four steps, but it has just been reduced to one simple step. Read the article and find out how it works.

The Rapid Attendance Mode

Login to your Fedena account and go to ‘Attendance’ in ‘Academics’ and it will take you to the ‘Attendance Home’ page.

rapid_1.png
Select ‘Attendance Register’ after which you need to select the respective batch for which you  want to mark the attendance register.

rapid_2.png

Select the batch for which you want to mark the attendance.

rapid_3.png

Select ‘Rapid Attendance’ which will allow you to mark the attendance without providing the reason for it. All you need to do is to click on the respective cell in relation to the particular student and the corresponding day he/she is to be marked absent.

Note: Under the new changes, you can also mark a student as absent without selecting the ‘Rapid Attendance’ option. In this case, when you click on the respective cell, the option of reason comes up, but you can save it without providing the reason.

rapid_4.png

Click the option ‘Add’ to store the attendance of the particular student without providing the reason.

Regulate Book Tags using Manage Tags Feature Available from Fedena 3.1.1

fede

Arranging books in library under tags sounds systematic and makes book searching an easier task. With Fedena, the task is made simple with easy tagging of books. In its earlier version, Fedena allowed tagging of books with some limitations. But the new version of Fedena 3.1.1 has come up with solutions that simplifies the way tags are managed in library. Read the article and know how tags are managed using the new version of Fedena.

The Old Scenario

In the earlier version of Fedena, under the Library plugin, books stored in the library were categorized under various tags like fiction, non-fiction, history, etc. The one shortcoming with  this scenario was that tags could not be managed, like for example, tags of books could not be edited or deleted.But the newer version of Fedena 3.1.1 has a solution to it – Manage tags feature.

The New Scenario

With Fedena 3.1.1, you can now make necessary changes like editing and deleting with the manage tags feature. To do this, you need to login to your Fedena account and go to ‘Manage Tags’ in ‘Library’.

tags_1.png


Select ‘Manage Tags’ and go to the page to manage the tags you want.

tag_2.png
You can edit the tag as is shown in the above screenshot. All you need to do is to click on the tag name and do the editing. Once you are done, click on ‘OK’. Deleting the tag is also made easy with ‘x’ sign as shown. Moreover, if you want to check which all books are tagged under the particular tag, you can do so using the ‘Tagged books’ option as shown above.

Your books and tags are now perfectly managed with this feature.